Communicate with ABP End Node on the LPS8-V2 Gateway
Table of Contents:
- 1. Introduction
- 2. Quick Start
- 3. Forward the data or store the data
- 4. Sent the downlink to the sensor
- 5. Trouble Shootings
1. Introduction
The LPS8-V2 of Dragino LoRaWAN gateway can communicate with LoRaWAN ABP End Node, the working is based on the built-in server TTN-Stack.
It can be used in some cases such as:
- No internet connection.
- Users want to get data forward in the gateway and forward it to their server based on MQTT/HTTP.
- Forward the data to the built-in Application server Node-Red.
- Just storing the data on the gateway or external storage
The basic of this feature is the decoding of LoRaWAN ABP End Node. Requirements:
- LoRaWAN End Node in ABP mode. Make sure your end node works in this mode. End node most are default set to OTAA mode
- LoRaWAN Gateway model: LPS8-V2
- System version: Since V.12
2. Quick Start
The default factory version of LPS8-V2 is installed with the Built-in LoRaWAN Server: The Things Network - Stack (Open Source 3.19 Version).
Once the gateway is DHCP an IPV4 address, and then you can access the build-in server TTN-Stack.
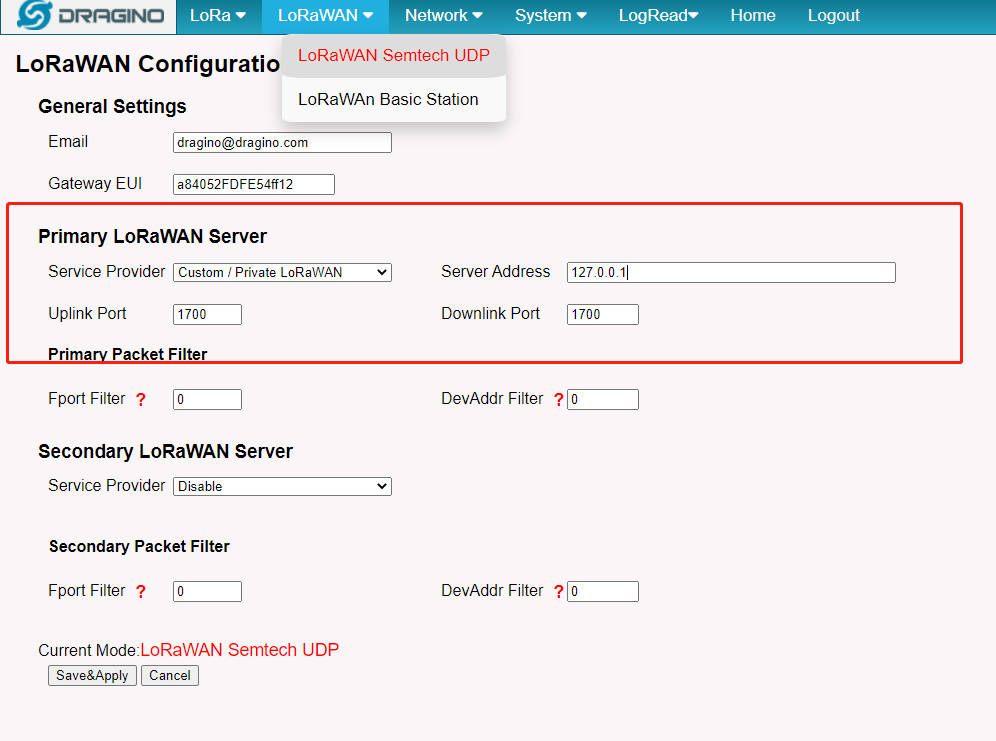
2.1. Configure the gateway mode
You can access the gateway's Manage Web UI, via the URL ( http://<hostname> or http://<local-IPV4-address> ) in your browser
Selecting the right frequency band
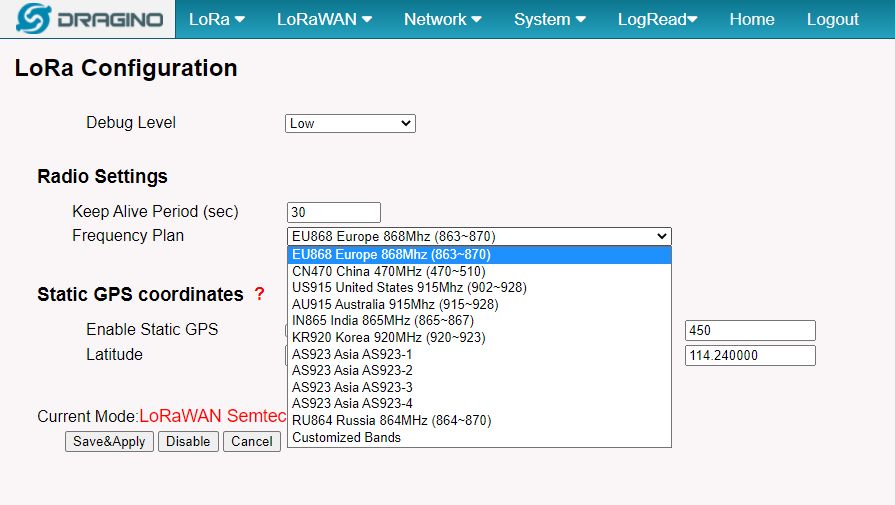
Configure the Semtech UDP forwarder
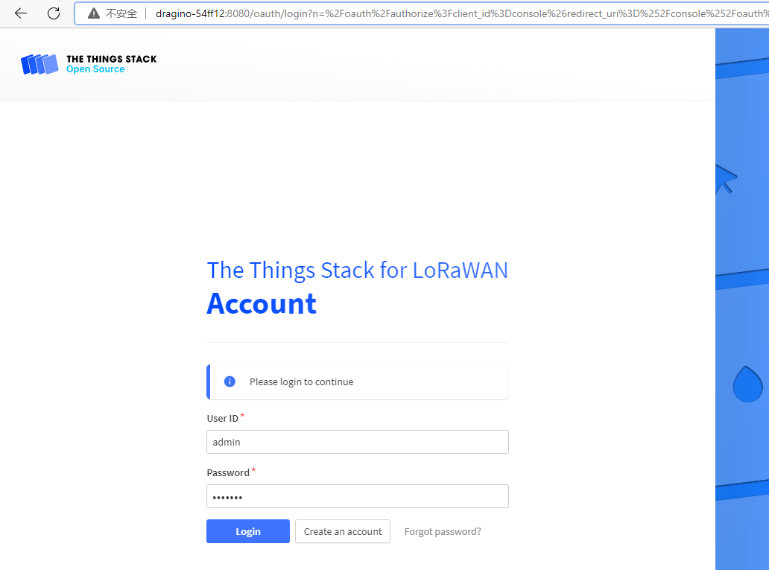
2.2. Login to the built-in server TTN-Stack
You can access the gateway's built-in server of The Things Network - Stack via the URL( http://<hostname>:8080 or http://<local-IPV4-address:8080> ) in your browser.
Such as http://dragino-54ff12:8080 or http://<Local-IPV4-Address>
Login account:
User ID: admin
Password: dragino
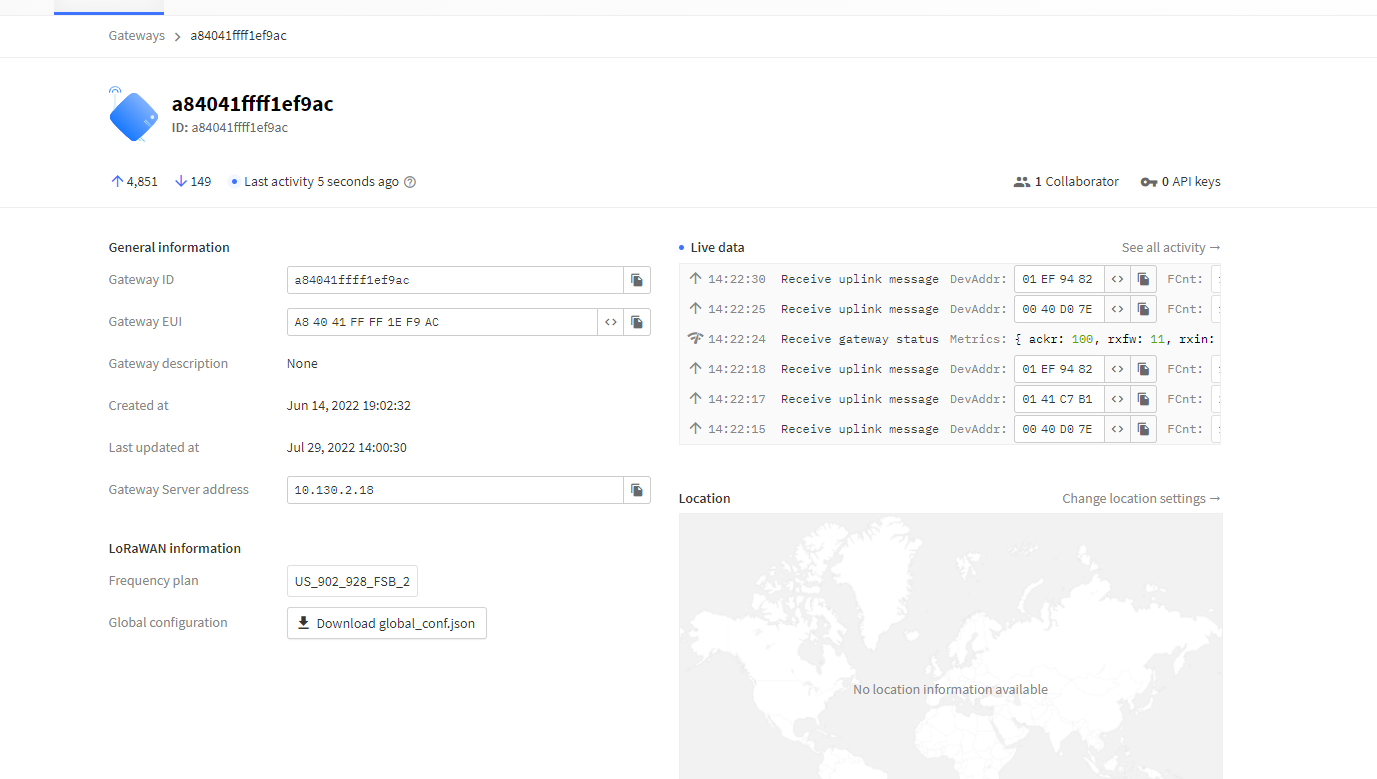
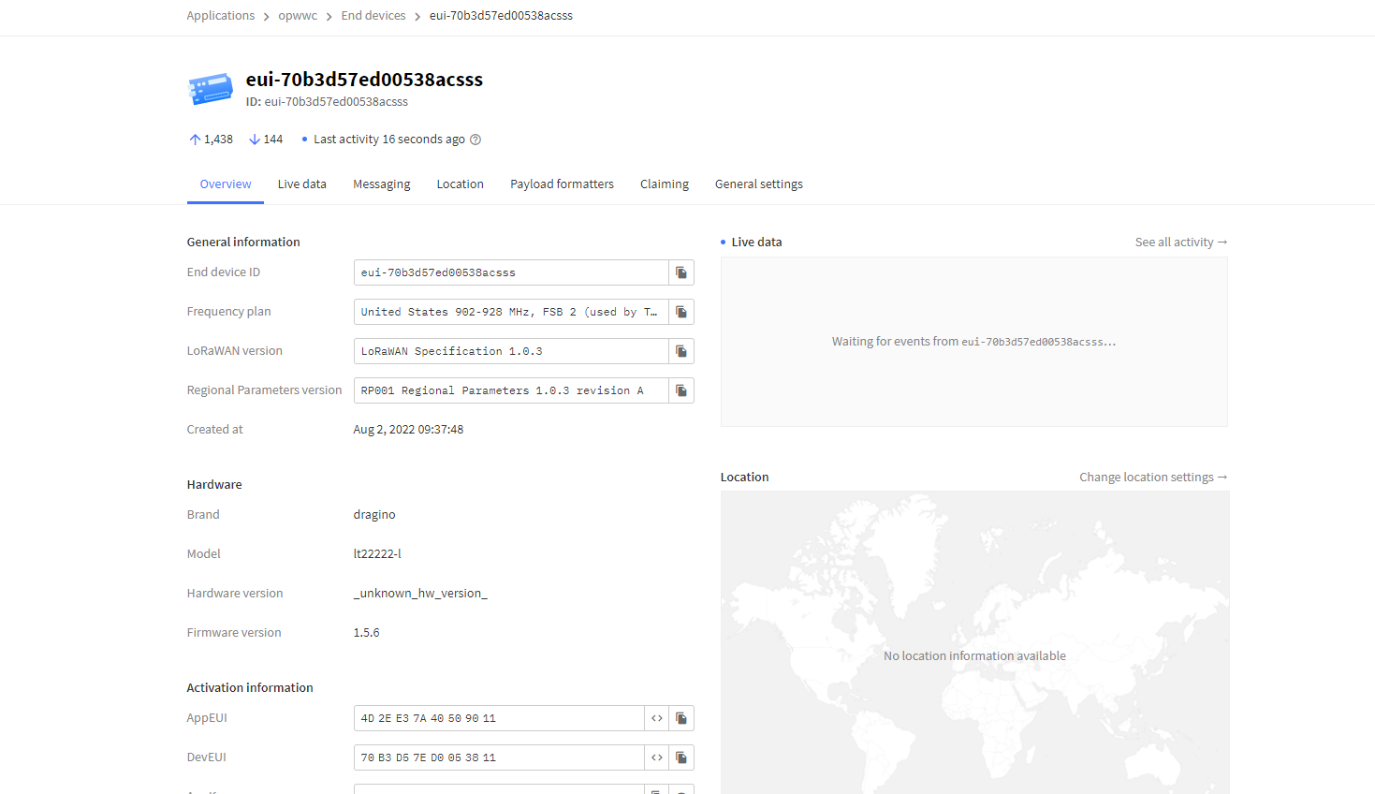
2.3. Add the gateway & the sensor
Here only show the image of the finish, more details about how to add the gateway & sensor refer to this wiki:
Add the gateway
Add the Sensor
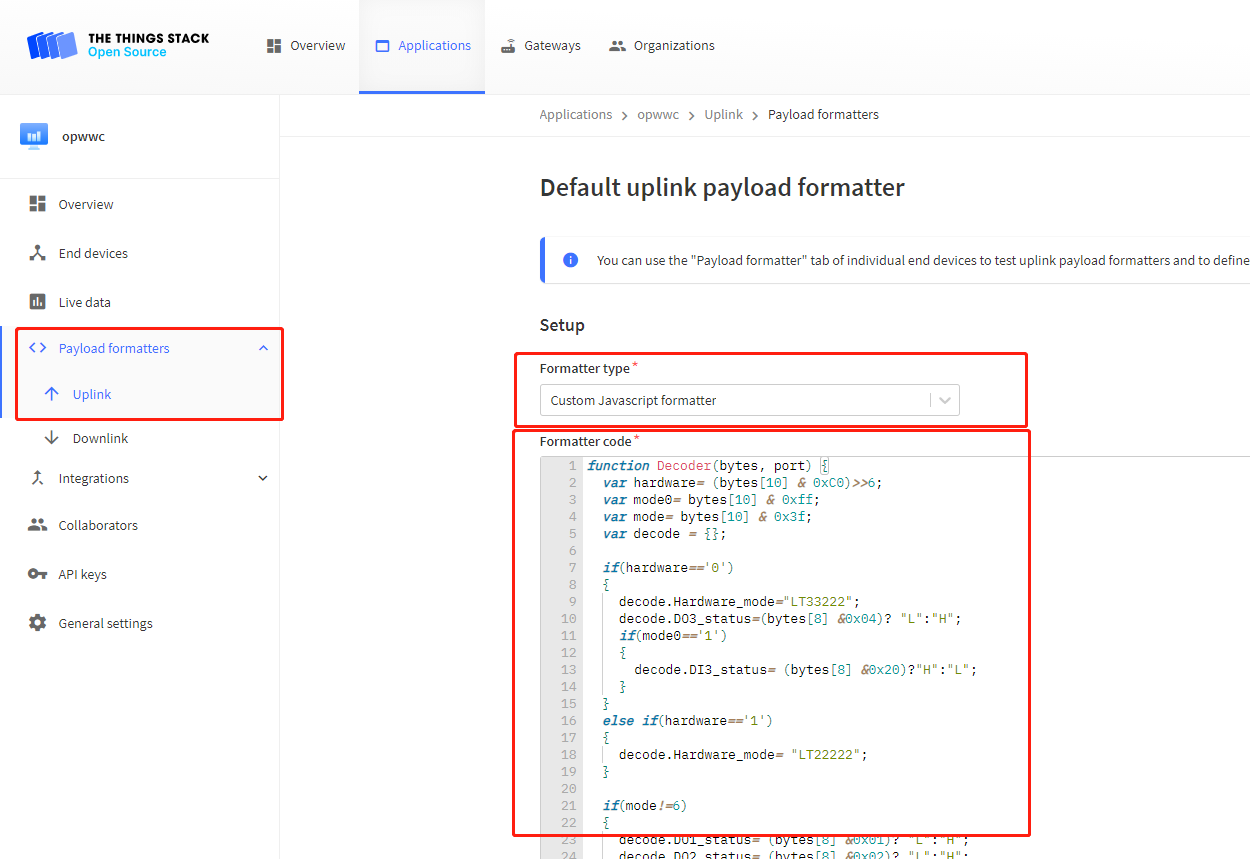
2.4. Add the decoder
If you use dragino sensors then you can find the recorder on this URL:
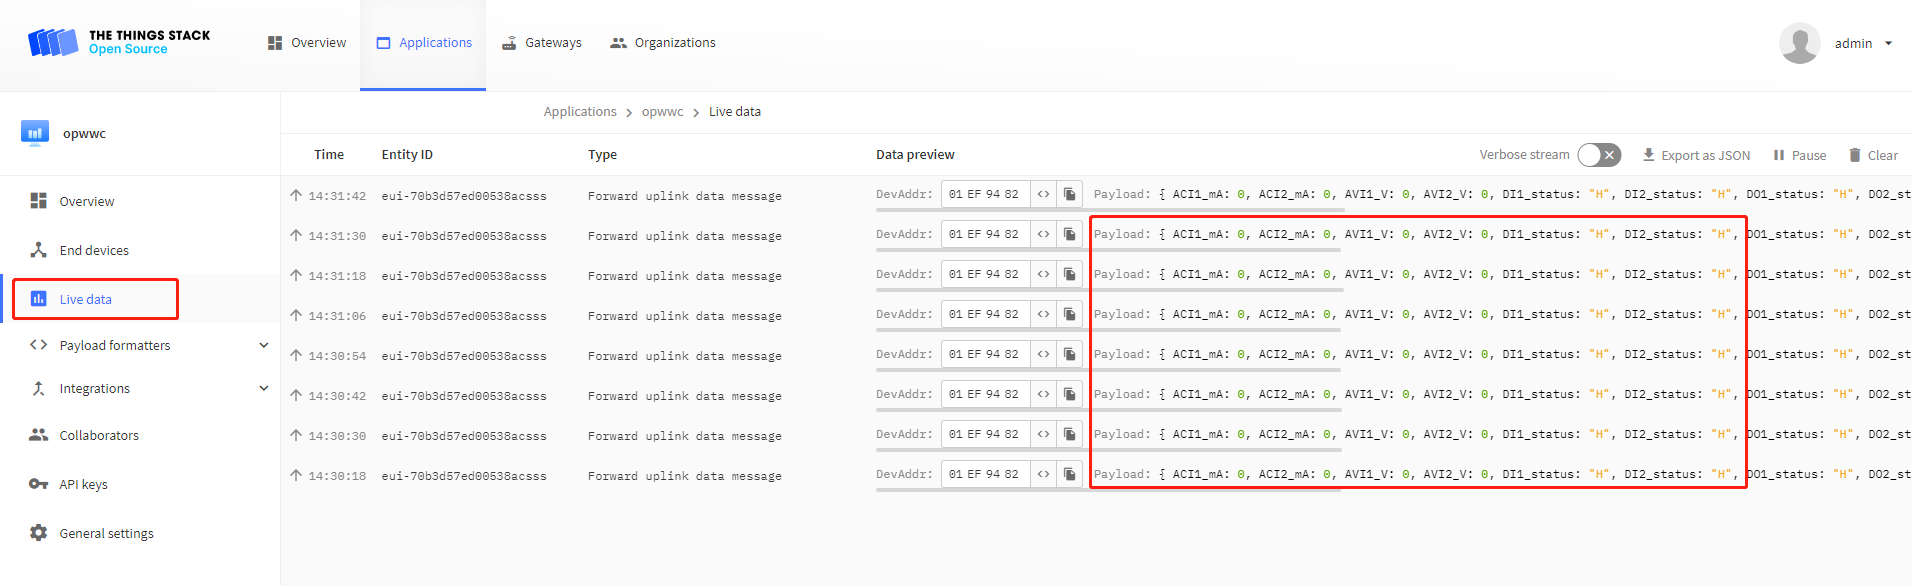
2.5. Visual Data
In this section, you can be seen that the payload of the sensor has been interpreted as visual data.
And the next part will discuss where to let the data flow。
3. Forward the data or store the data
You are done most of the work, now you just need to plan the flow of data to where.
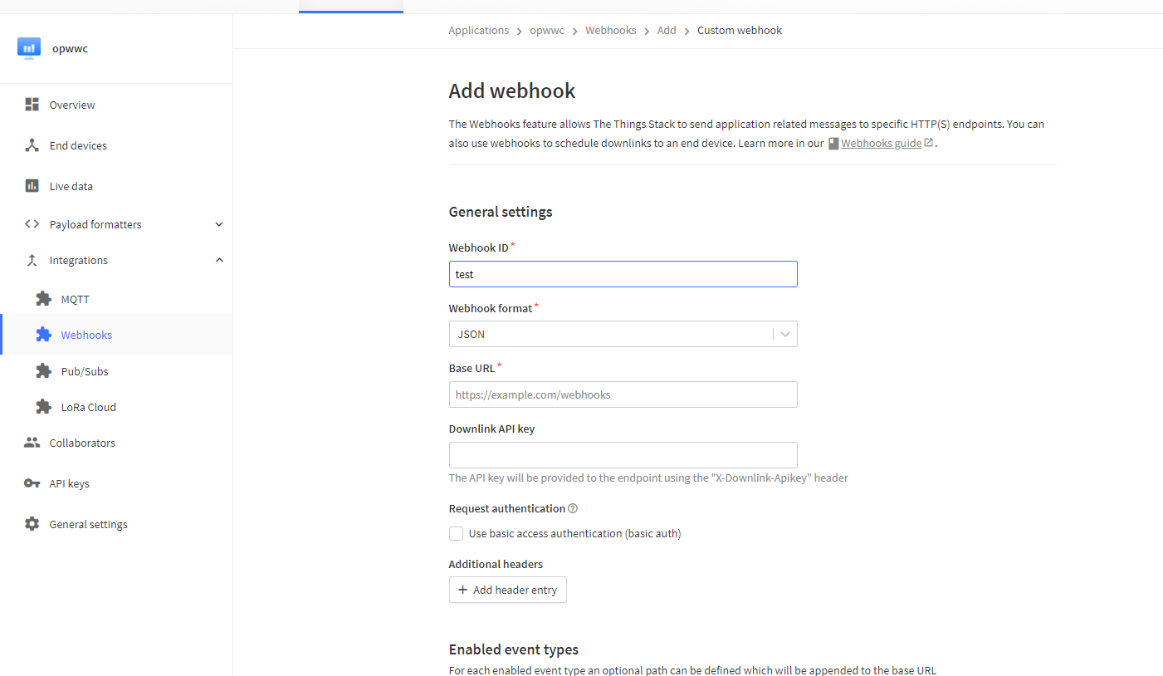
3.1 Forward data to an external server based on MQTT/HTTP.
MQTT
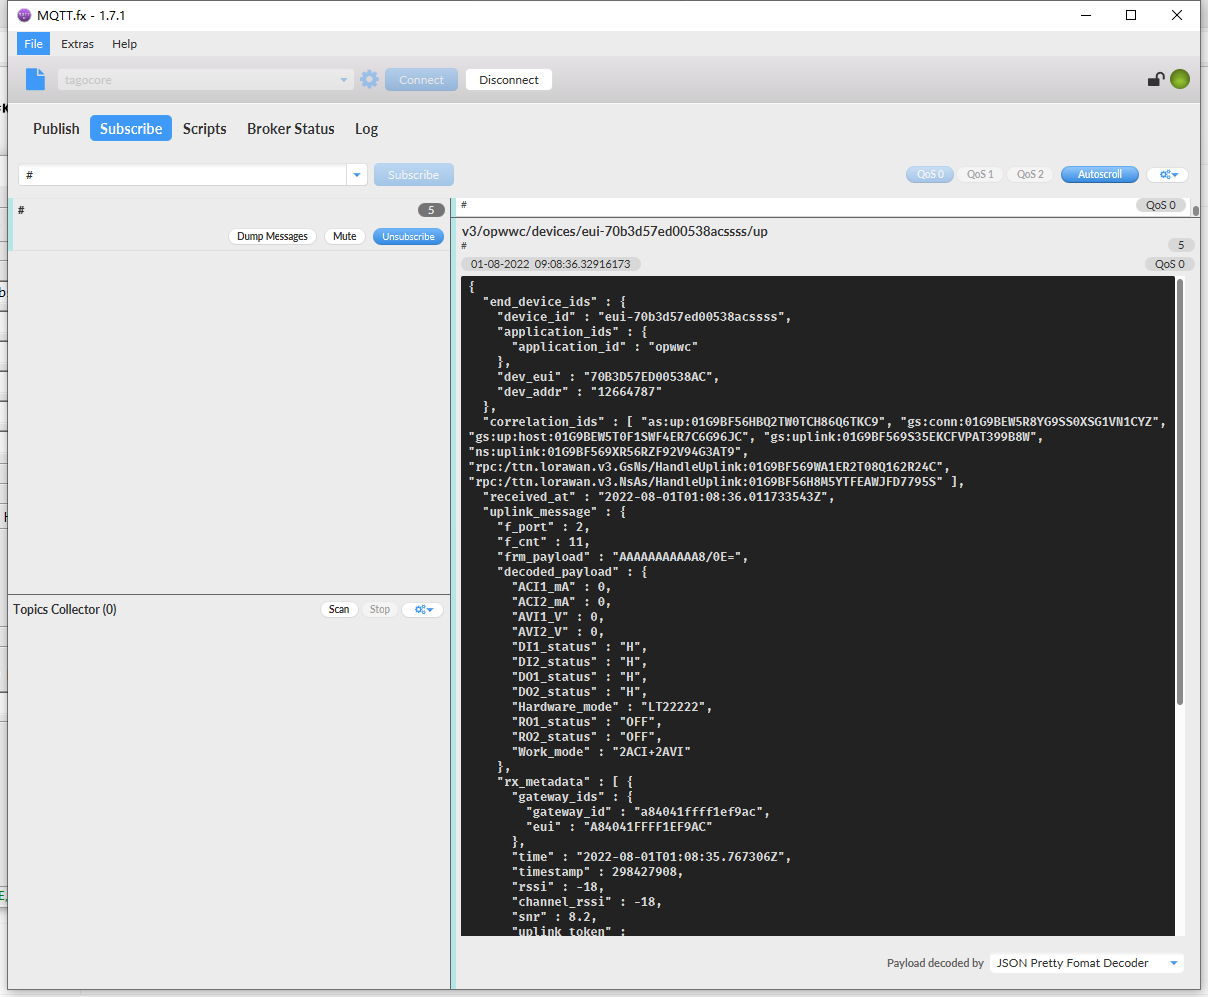
You need to connect to this public address on your external server and subscribe to the topic (v3/<application_name>/devices/<devices_name>/up).
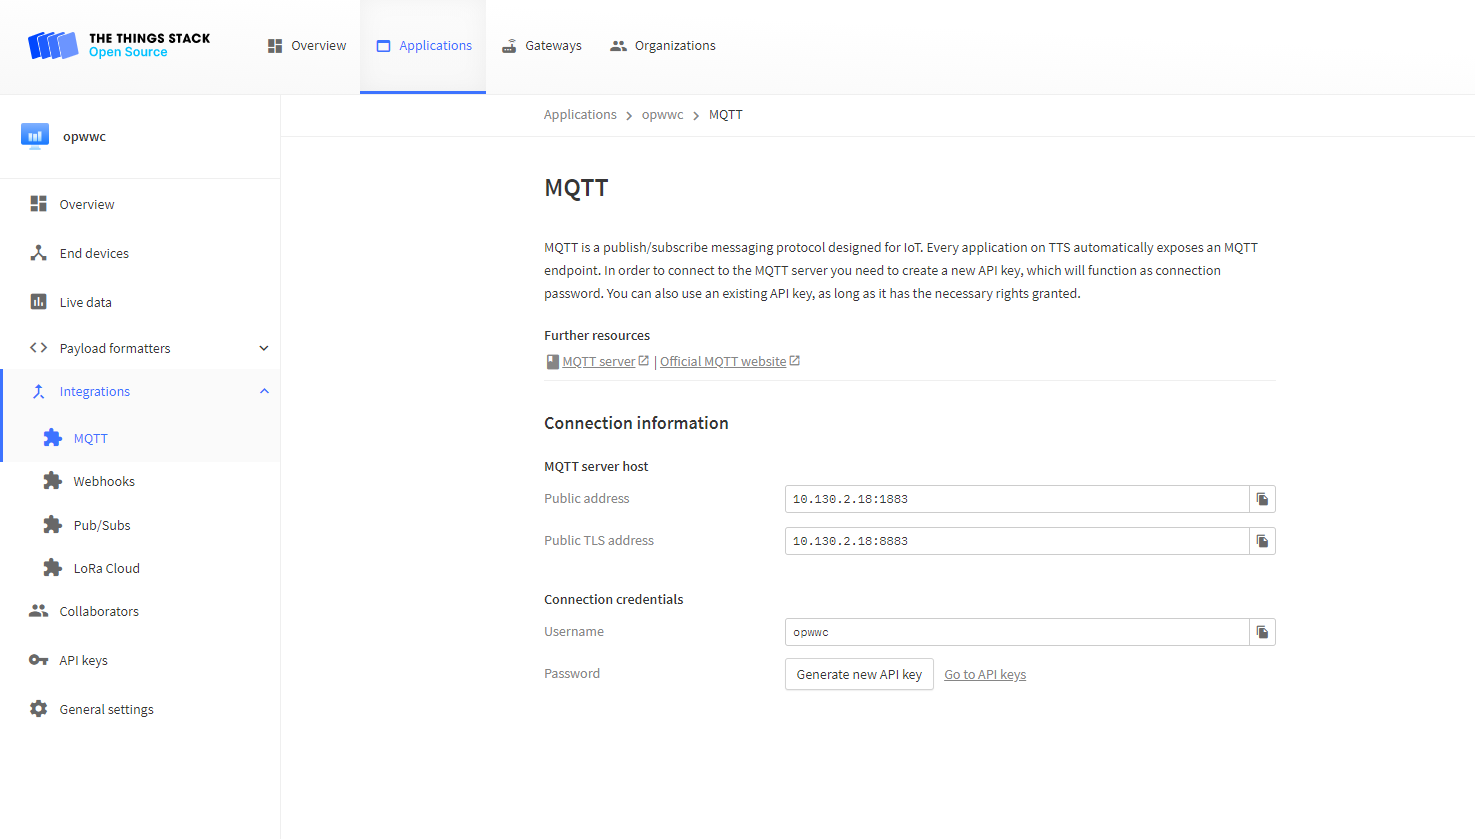
subscribe to the topic and get the data
HTTP
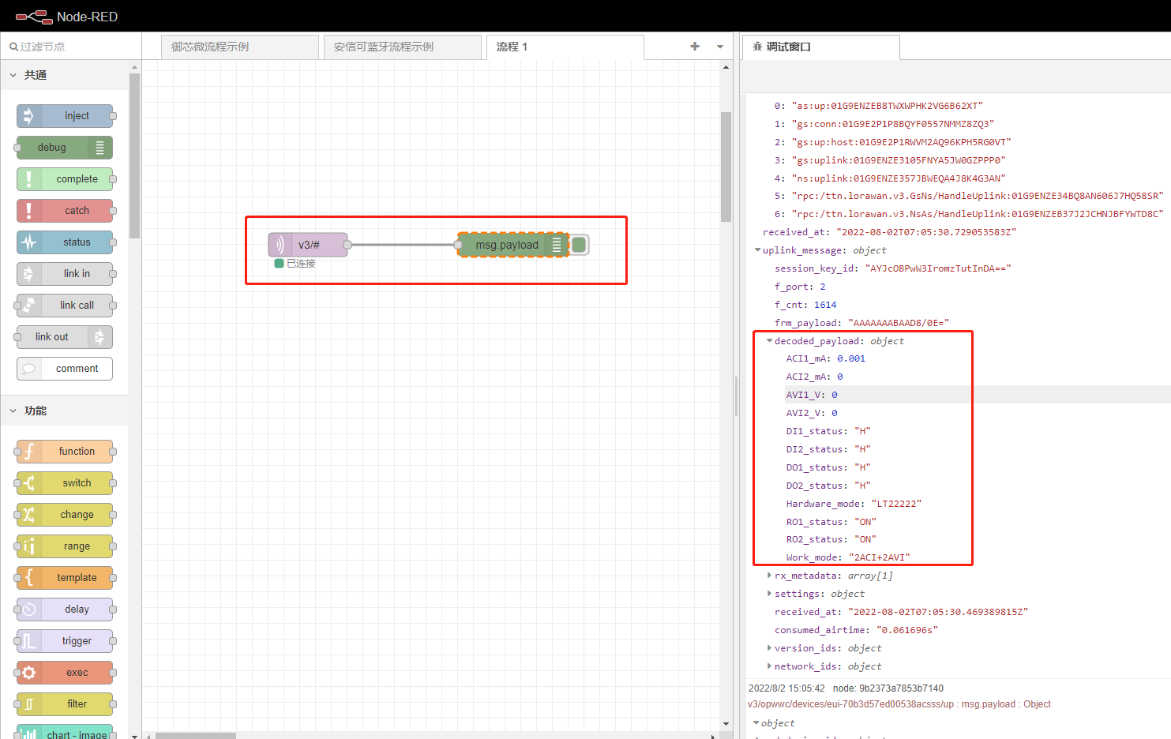
3.2 Forward data to the built-in application server Node-Red.
3.3 Just storing the data on the gateway or external storage.
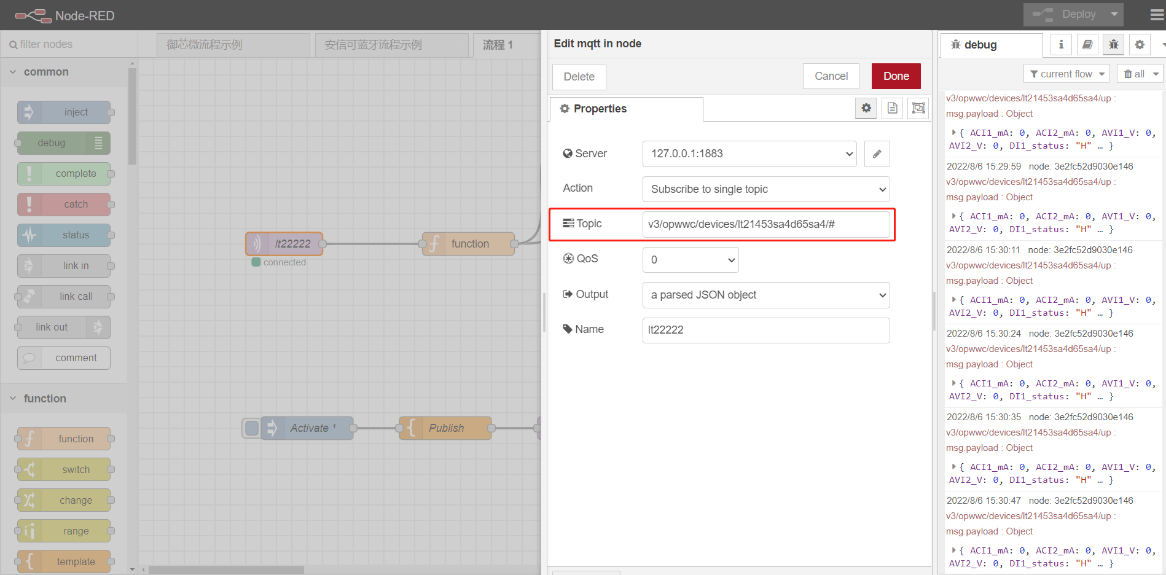
Data can be stored or read by subscribing to topics: v3/<application_name>/devices/<devices_name>/up.
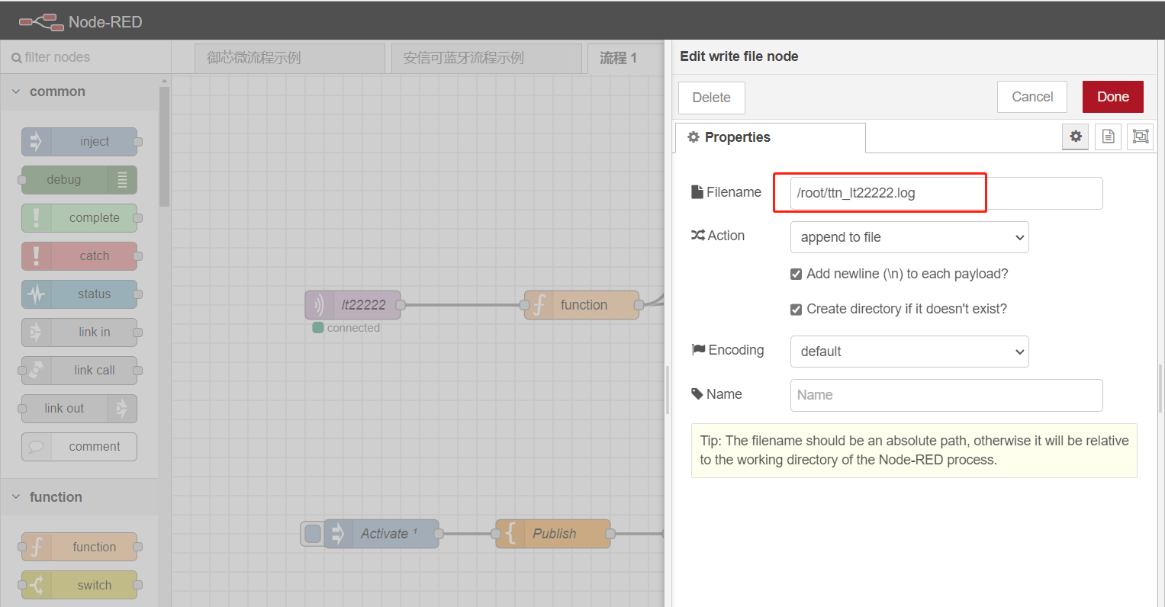
Then add the storage node (write file), Users can download the Node-Red flowchart from this link to test data storage:
After the configuration is complete, users can find the node logs in the root/ directory


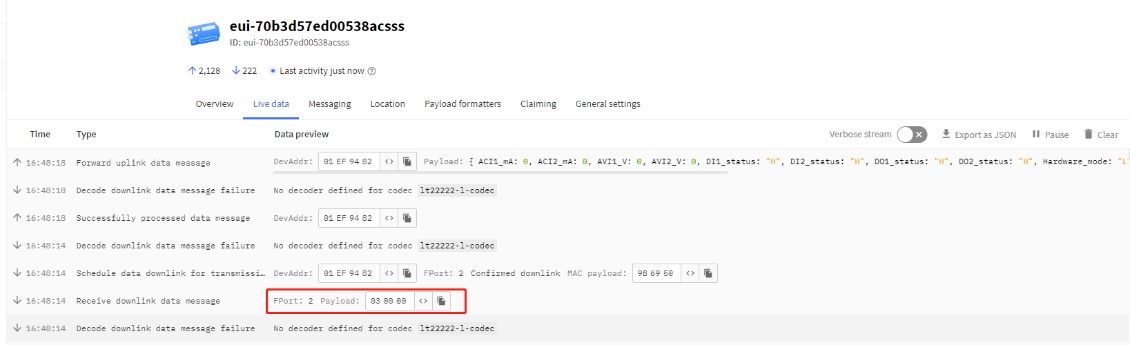
4. Sent the downlink to the sensor
Downlinks can be scheduled by publishing the message to the topic v3/<application_name>/devices/<devices_name>/down/push.
Note: Remember that the format of this topic for The Things Stack Open Source deployment would be (v3/<application_name>/devices/<devices_name>/down/push).
MQTT Server | The Things Stack for LoRaWAN (thethingsindustries.com)
Instead of /push, you can also use /replace to replace the downlink queue. Replacing with an empty array clears the downlink queue.
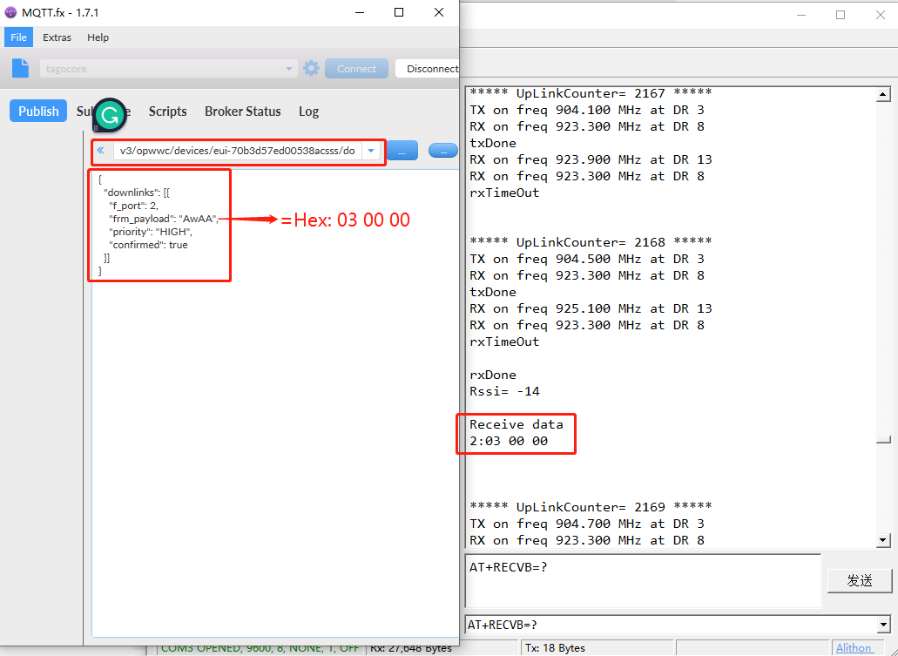
Example:
{
"downlinks": [{
"f_port": 2,
"frm_payload": "AwAA",
"priority": "HIGH",
"confirmed": true
}]
}
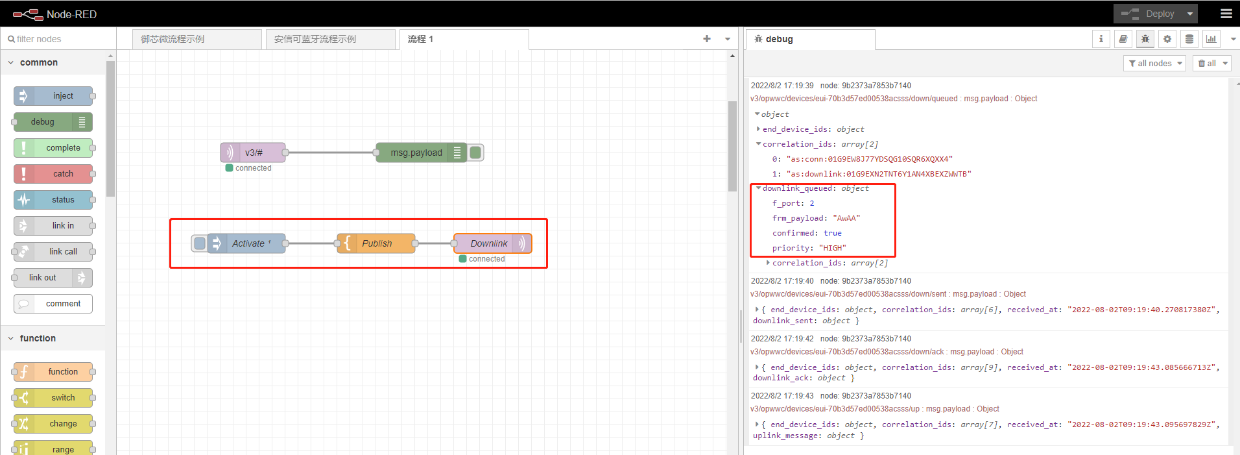
Node-red
Users can download the Node-Red flowchart for testing
5. Trouble Shootings